Validate MTF installation
Getting started
Begin by cloning the ‘MTF_tutorials’ repository. Here are the instructions for cloning the repository on different operating systems:
Clone repository in Windows
Download and install Git.
Open your command prompt or terminal window.
Navigate to the directory where you want to clone the repository.
Use the ‘git clone’ command followed by the URL of the ‘MTF_tutorials’ repository.
git clone https://git.technica-engineering.net/te-libraries/mtf_tutorials
Clone repository in Linux
Download and install Git following this instructions provided here: Download for Linux and Unix.
Open your terminal window from the application menu or by pressing ‘Ctrl+Alt+T’.
Navigate to the directory where you want to clone the repository.
Use the ‘git clone’ command followed by the URL of the ‘MTF_tutorials’ repository.
git clone https://git.technica-engineering.net/te-libraries/mtf_tutorials
Project files overview
validate-MTF-installation-project
 |-- .vscode
 |   |-- launch.json # Configuration for development tools like VS Code
 |-- Config
 |   |-- TestBenchConfig
 |       |-- MTF_tb
 |       |   |--virtual_can_channel.yaml # Test bench configuration
 |       |-- TestSeries
 |           |-- validate_MTF_installation.xml # Test series configuration
 |
 |-- Tests
 |   |-- validate_MTF_installation
 |   |   |-- __init__.py # Marks the directory as a Python package
 |   |   |-- test_case_fixture.py # Optional: environment setup/cleanup (test case level)
 |   |   |-- tca_validate_mtf_installation.py # Test case implementation
 |   |
 |   |-- __init__.py # Marks the directory as a Python package
 |   |-- project_fixture.py # Optional: environment setup/cleanup (global level)
 |-- Results
 |-- config.json # xTR configuration file
 |-- MTFTestingFramework.py
Key files description
virtual_can_channel.yaml: This YAML file is the test bench configuration file. In this example, we showcase two virtual CAN channels, enabling users to run the project without being limited by hardware constraints in any environment.
validate_MTF_installation.xml: This XML file specifies which test cases to be executed by the xTR test runner.
__init__.py: This file is a special marker to signify that a directory is considered a Python package.
test_case_fixture.py (optional): This file defines setup and cleanup actions specific to the test case.
tca_validate_mtf_installation.py: This file contains the actual test steps that validate the MTF installation.
project_fixture.py: This file defines setup and cleanup actions for the whole execution.
config.json: This JSON file specifies the locations of important files for xTR.
NameTestingFramework.py: This file provides essential information for test cases including global variables, configuration files locations and test results destinations.
Important
To understand the xTR test runner project, including its setup, files, execution and test outcomes, please refer to the section titled: Test runner for python test cases
Running the script
Execute command
After cloning the MTF_tutorials project, navigate to its directory and open your terminal or command prompt. Then, execute the following command:
xtr --test_series validate_MTF_installation.xml --search_paths %CD% --output_path ./Results --testing_project validate-MTF-installation-project --test_bench "MTF_tb" --config_file %CD%/Config/TestBenchConfig/MTF_tb/virtual_can_channel.yaml --HTML_gen True
Command options explanation
- -test_series: This parameter indicates the location of the test series XML file.
- -search_paths: This parameter includes extra directories that the Python interpreter should check when searching for modules.
- -output_path: This parameter specifies the target directory where the reports will be saved.
- -testing_project: This parameter indicates the name of the testing project. This name is linked in the internal configuration of xTR.
- -test_bench: This parameter identifies the name of the specific test bench where the tests are executed.
- -config_file: This parameter specifies the path to the test bench’s configuration file.
- -HTML_gen True: This parameter determines whether HTML reports should be generated or not.
Expected outputs
The ‘Results’ folder should contain execution outputs in various formats. It includes general test results files alongside two sub folders: ‘Global’ and ‘Tests’.
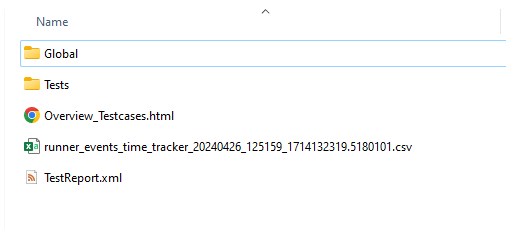
Global test results
At the global level, meaning within the ‘Results’ folder, xTR generates a JUnit report file, an HTML file and a CSV file.
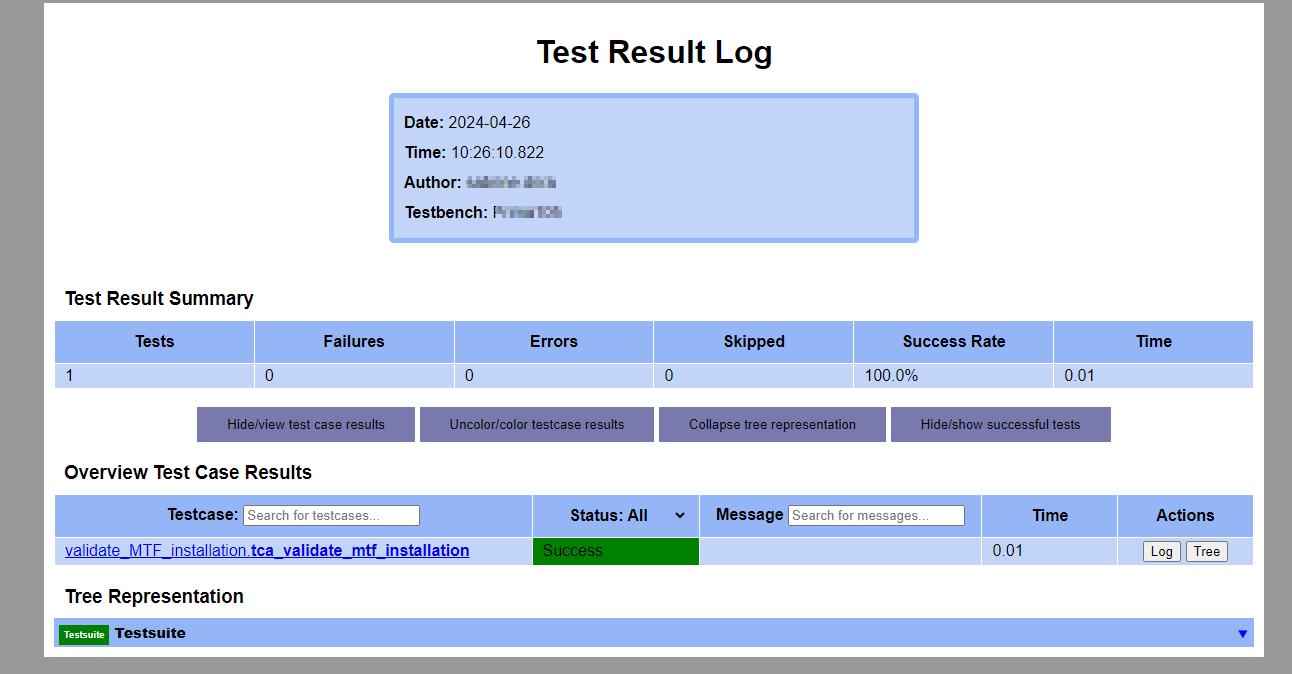
HTML file
The HTML file gives details about the number of executed tests, failures, errors, skipped tests, the success rate of the entire execution and its duration. It also offers an overview of the test case results.
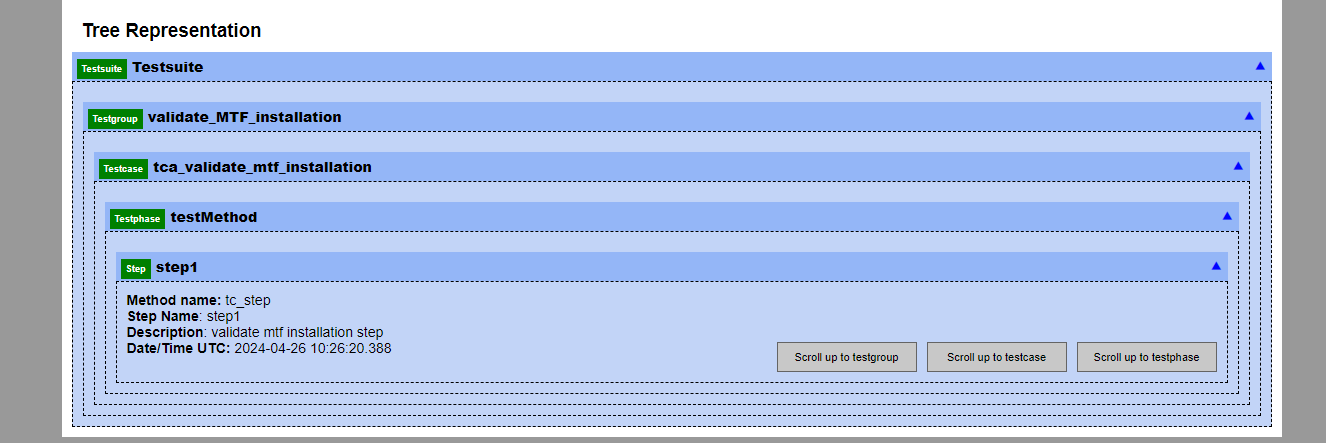
Additionally, the HTML report provides a tree representation of the test suite, which include the test suite, test groups, test cases, test phases and test steps.
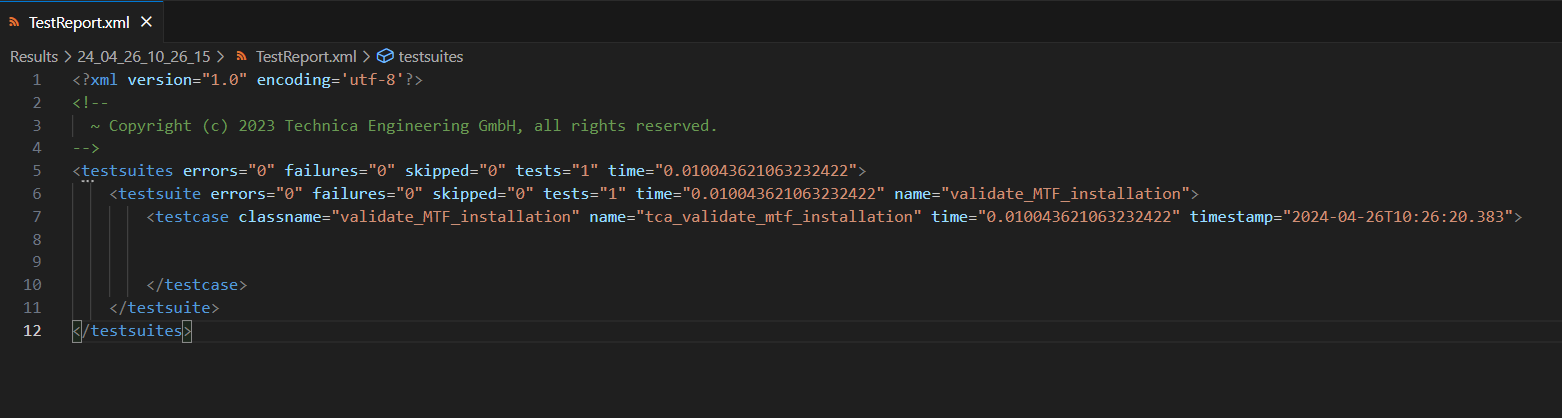
JUnit report file
The JUnit is an XML file that gives the same information as the HTML file, including details about test suite and test case statuses.
CSV file
The CSV file, typically named ‘runner_events_time_tracker’, contains statistics for each step of the execution.