Write a Robot test case
Since Robot Framework is an automation framework, you can create and execute test cases, and track tests results from the generated output without needing a separate test runner, as Robot Framework itself serves as the test runner.
Steps
First, install Robot Framework. Follow these steps for the Robot Framework installation.
Next, create a .robot file with the test case name.
Write your first test case following this template:
Robot test case template*** Settings *** Resource path/to/values.resource Library library_name *** Variables *** ${var1} var1 ${var2} var2 *** Test Cases *** test case name # test case logic
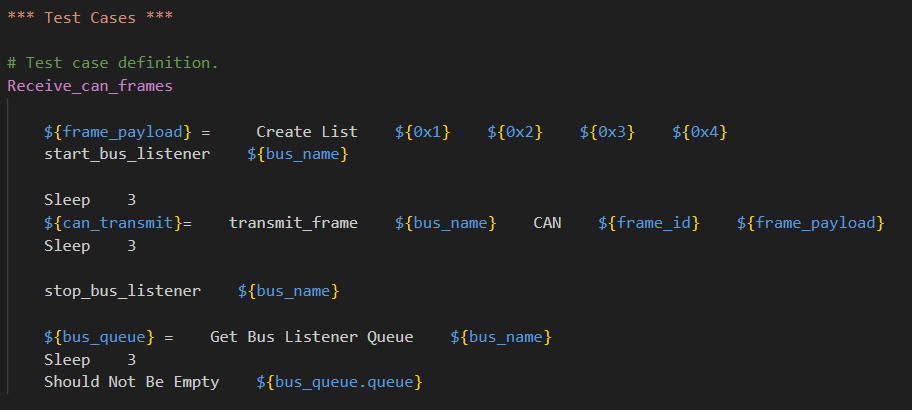
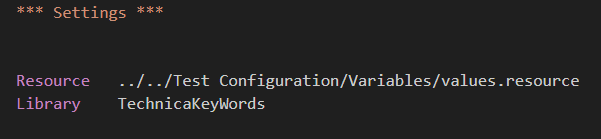
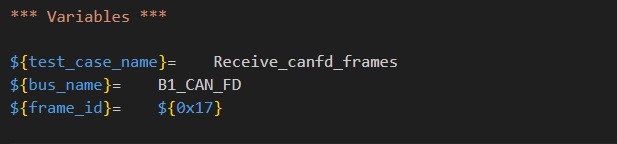
Test case structure
Similar to Robot Framework test cases, the MTF/Robot test case follows a structured format designed to be easily maintainable. It typically consists of the following sections:
Settings section
This section specifies the test case’s settings and configurations. It includes information such as the documentation and settings for the test case execution.
Variables section
It is an optional section. Inside it, you can define variables that your test case will use. These variables are set at the test case level.
Test steps section
This is the core of the test case, where you define the sequence of test steps using keywords. You can use built-in keywords, user-defined keywords or combination of both to perform instructions and verifications.