License request
A license is required to execute the MTF Framework, though you don’t need one to create test cases or install MTF. This document provides instructions for requesting and adding a license to your computer.
It is essential to read through the entire guide first, as it likely answers any questions, rather than focusing only on specific sections. All steps must be completed on the machine where the license will be added.
If you still have issues, please send your questions to MTF Service Desk (explained in Step 2: Create the license request file (digital license)).
Step 1: Determine the required license type
The tool that MTF uses to manage licenses, ‘CodeMeter’, offers two types of licenses: a dongle license and a digital license.
Dongle license
This license is provided on a USB dongle (extra cost applies). It allows you to use the license on any computer, but it is only active on the computer to which the dongle is attached. This is useful when you need a license without tying it to a single computer. It is also beneficial for Docker machines as the license can be shared between the host machine and the Docker via the USB, and for computers without internet connection as they won’t be able to update time certificates.
Digital license
This license is attached to a specific computer. It saves you the cost of the dongle, but can only be used on a single computer. We recommend this license because there is no need to wait to receive a dongle.
IMPORTANT: If the computer is reset to its original state, a new license will need to be issued.
Important
The steps explained in this document apply to the digital license. If you have ordered a physical dongle, only refer to step2.
Step 2: Create the license request file (digital license)
To send the request, you first need to generate the request file on the computer where you want the license installed. Below are the steps for Windows and Linux.
Windows
Install the CodeMeter application to manage the license and use the default settings.
If you are within the Technica network, you can find it in the Technica Self Service app.
If you are not within the Technica Network, you can download it from Software for users - Wibu-Systems and navigate to the section titled ‘CodeMeter User Runtime for Windows’.
Import the following license container into the CodeMeter Control Center application:
license container:“Universal_Firm_Code_CmActLicense_6000521.WibuCmLif”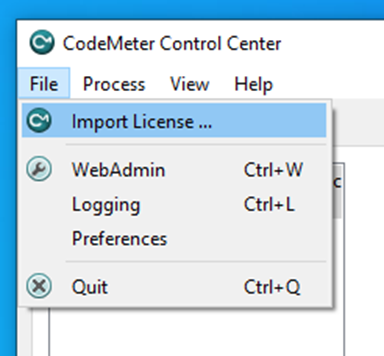
Generate the request file to create a license for the computer you are using (note that the license is attached to one computer):
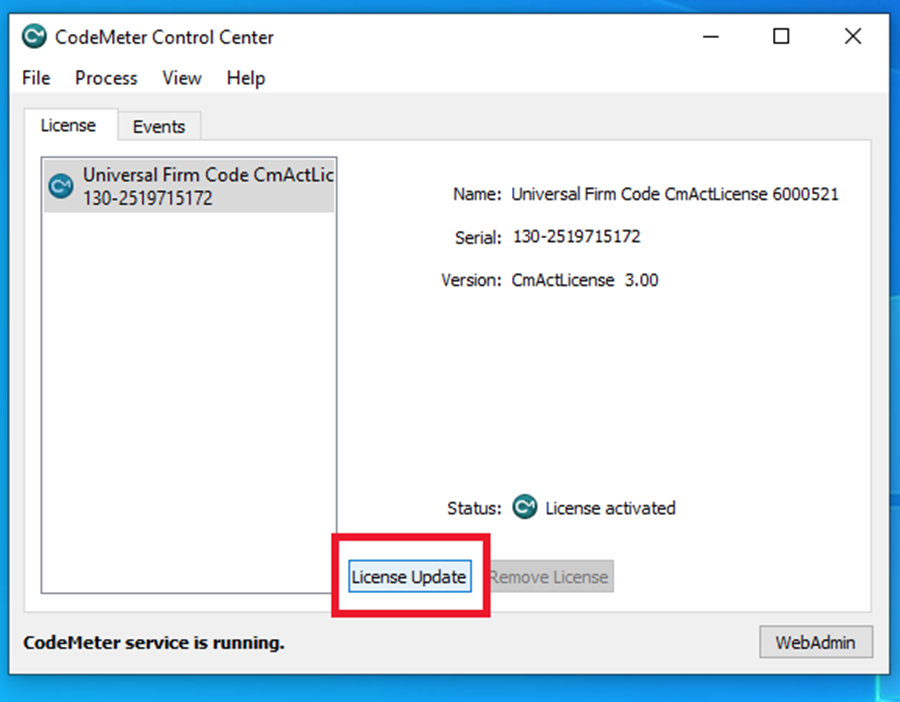
Step 1 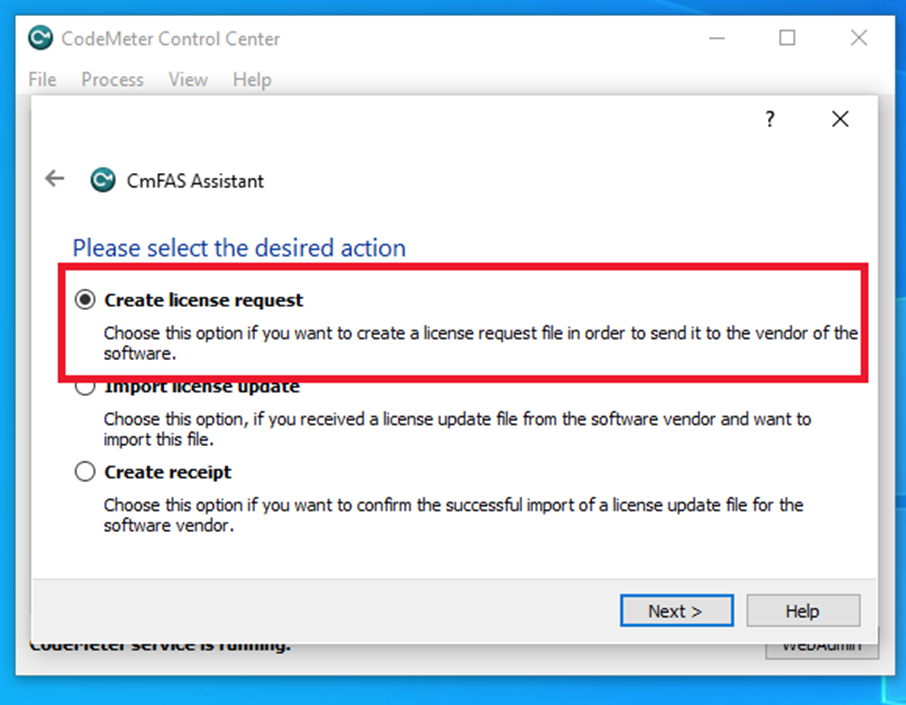
Step 2
Linux
Install the CodeMeter application to manage the license.
license container:“codemeter_7.51.5429.500_amd64.deb”Use the file above or download a similar one from Software for users - Wibu-Systems and navigate to the section titled ‘CodeMeter User Runtime for Linux’.
sudo dpkg -i codemeter_7.51.5429.500_amd64.deb
Import the license container using the CodeMeter Control Center application commands.
license container:“Universal_Firm_Code_CmActLicense_6000521.WibuCmLif”cmu --import --file Universal_Firm_Code_CmActLicense_6000521.WibuCmLif
Generate the request file to create a license for the computer you are using (note that the license is attached to one computer). Begin by obtaining the automatically generated serial number for your computer:
cmu -x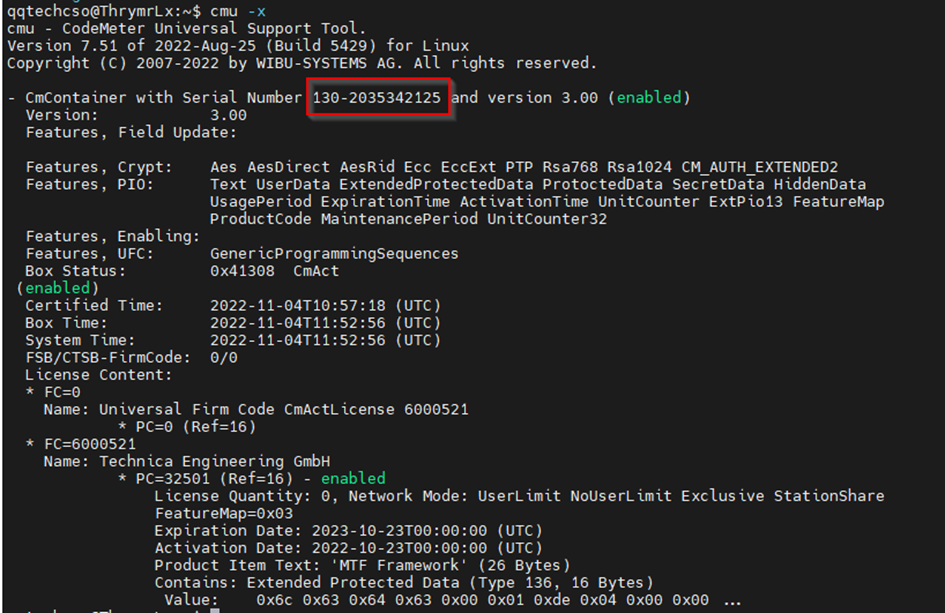
cmu -s <serial> -c 6000521 -f request.WibuCmRaC
Step 3: Order the license via ServiceDesk
To request a license, you need to submit your request via ServiceDesk. In case it is your first time using ServiceDesk, we will explain how to access it first.
Accessing ServiceDesk
The MTF ServiceDesk can be accessed via this Link: MTF Service Desk.
Additionally, if you navigate through the main ServiceDesk page of Technica, you will find access available there as well:
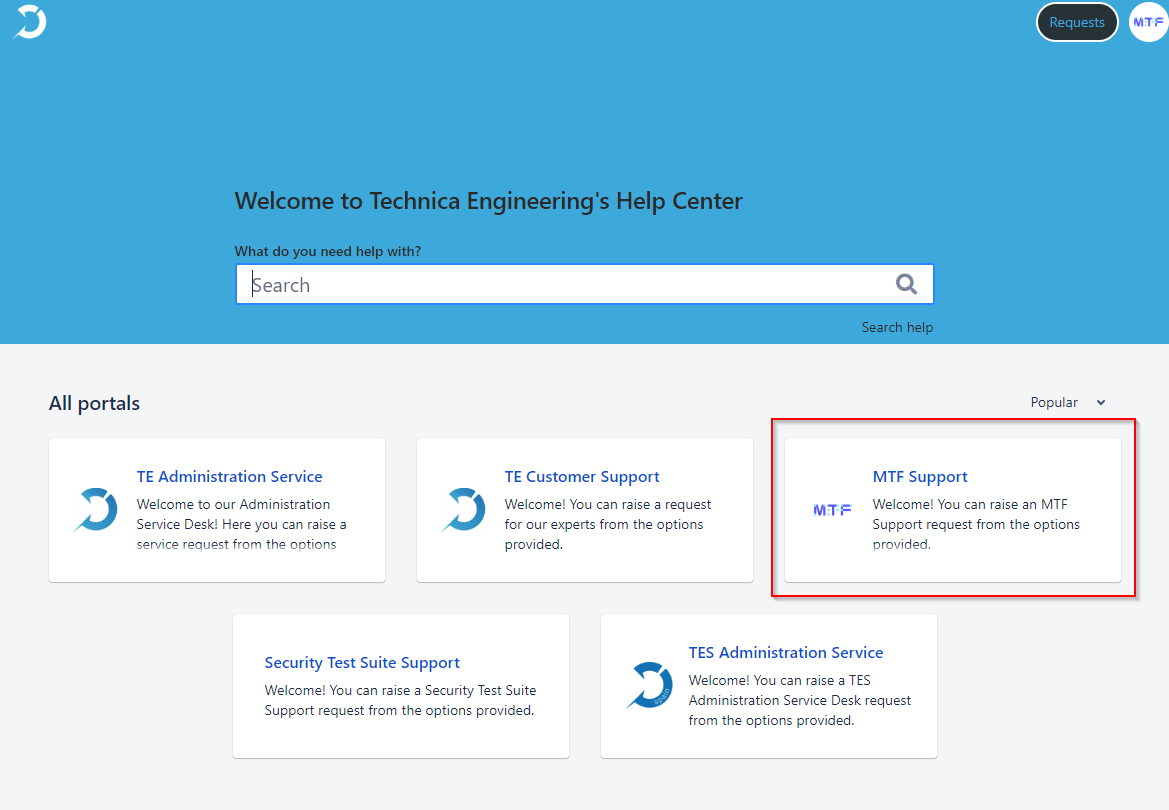
You will need to have user credentials in order to access it.
If you are a user from Technica Engineering, you already have access.
If you are an external user, you will need to request for an access.
Navigate to this link https://jira.technica-engineering.net/servicedesk/customer/user/login?destination=portals
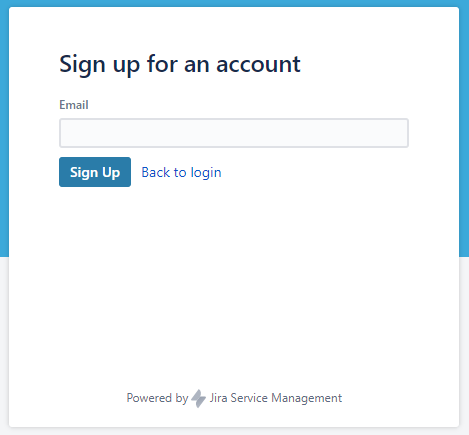
Click on “Sign up for an account”:
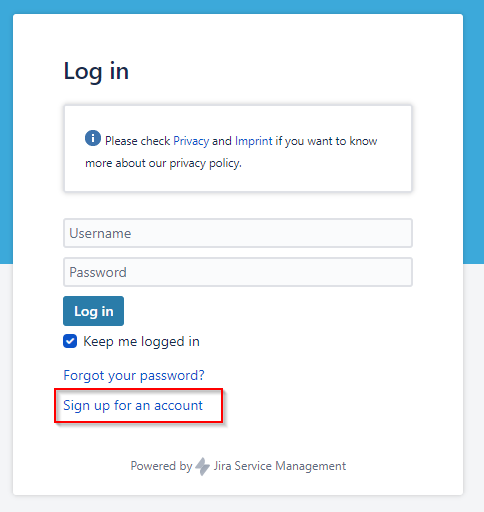
Fill in the details, and you will receive the login information later.
Creating the license request
In the MTF Service Desk page MTF Support - Service project technica-engineering.net, create a request for “Licensing and billing”:

Fill in all the details:
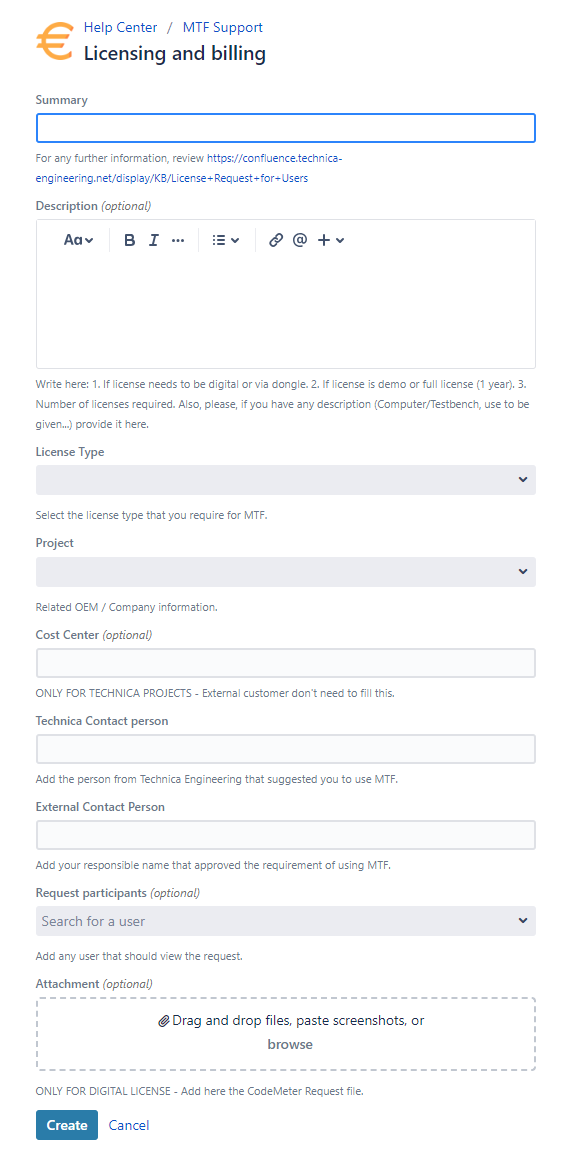
Information for license request order form
You need to complete the order form because we require the order confirmation number to process the license. Please provide the following information:
Number of licenses needed
Preferred license format:
Dongle license
Digital license
Type of license (see the Modules section for more details on functionalities):
Basic
Basic + Signal oriented communication
Basic + Service oriented communication
Advanced
Advanced High Performance
Advanced + Users Plugins
Complete
License request file in the attachment box (Step 2: Create the license request file (digital license))
Cost Center if you are an Technica employee, or Company Information if you are external
Once you have received the activation file, you can proceed with the process.
Step 4: Activate the license (digital license)
Windows
Once received, import the activation file into your application.
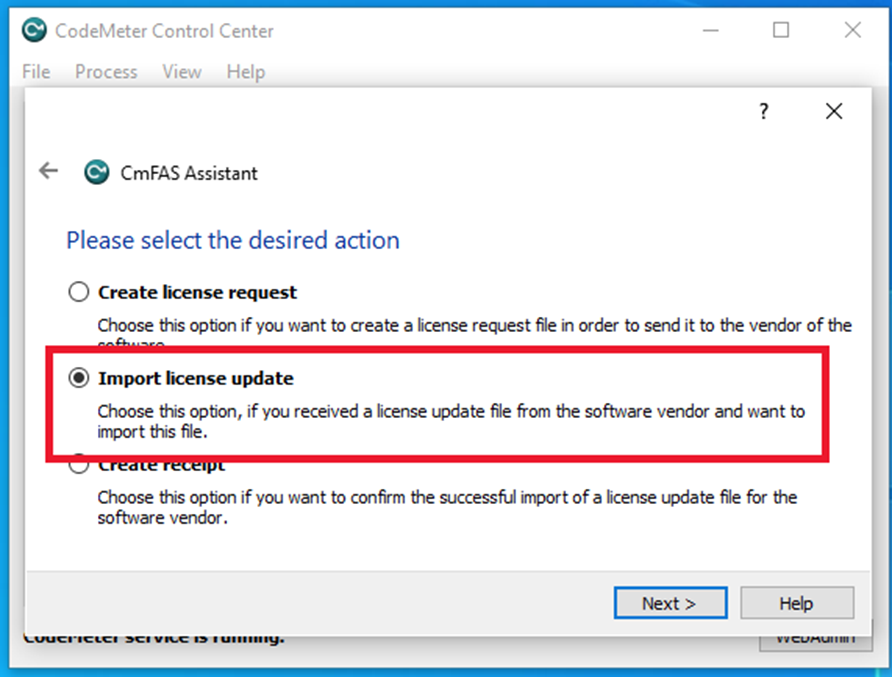
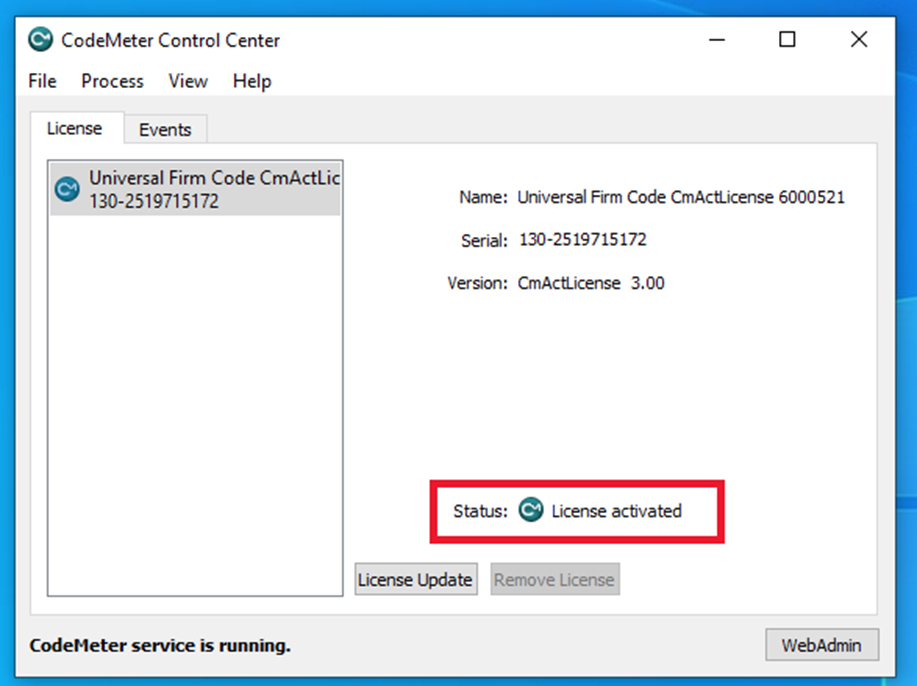
After completing these steps, the license should be activated.
Linux
Once received, import the activation file into your application.
cmu -i -f request.WibuCmRaU
After completing these steps, the license should be activated.
Step 5: Validate license is correctly activated
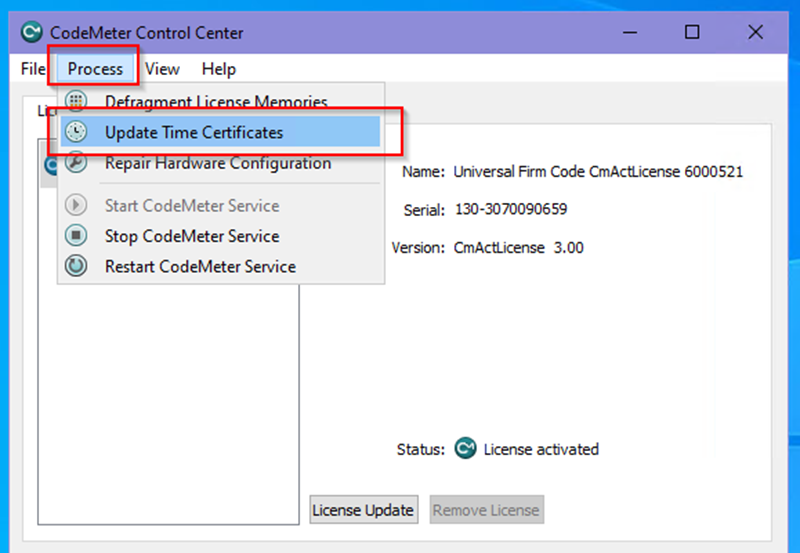
Update Time Certificates
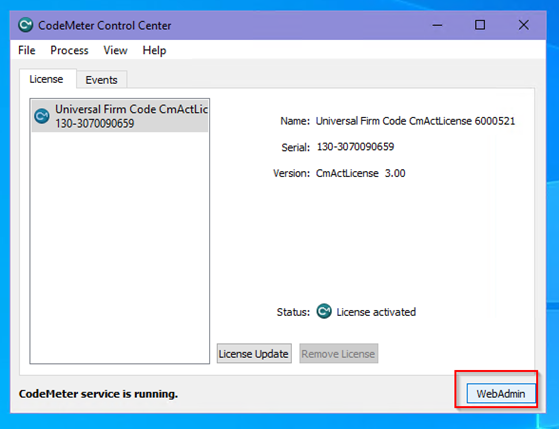
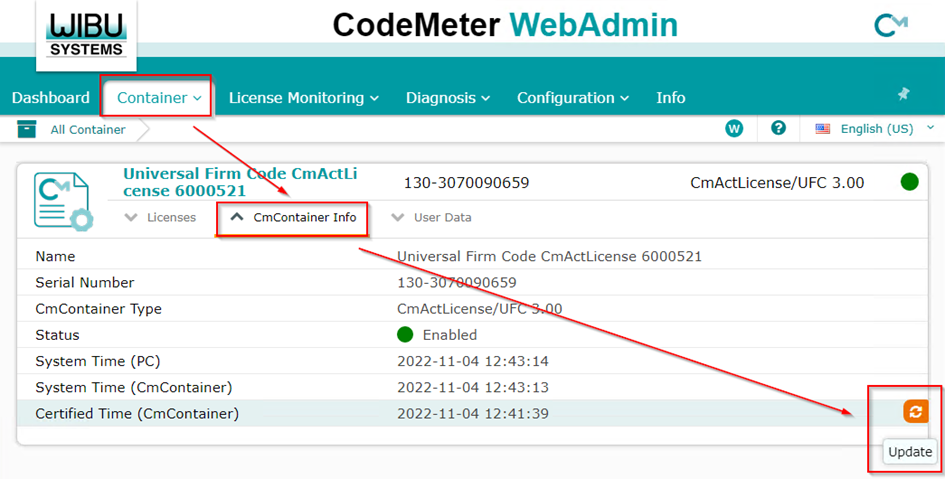
Although the license is activated, it may not be valid if the time has not been verified. The application needs the accuracy of the current machine time with its online server to ensure the license is within its validity period. To perform this validation, you can do it either in the “Update Time Certificates” section within the app, or through the WebAdmin:
Via App
Via the WebAdmin
Via Command Line (for Linux)
cmu --time-update
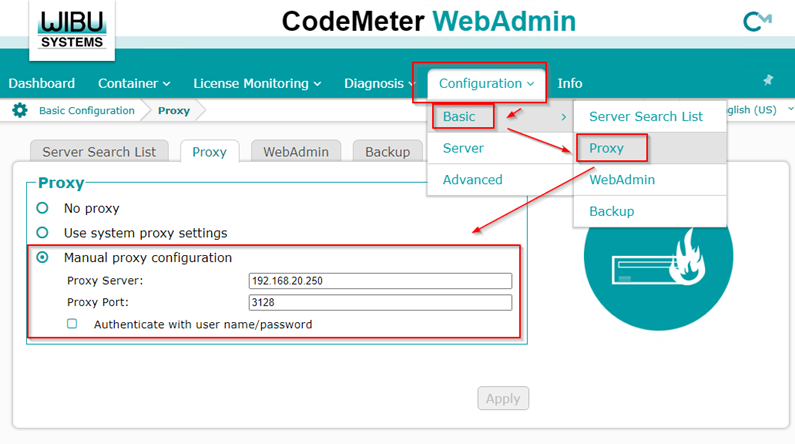
Check proxy if time update doesn’t work
The update of time certificates may encounter issues if you have a Proxy. Additionally, please verify in the WebAdmin that the Proxy data matches the configuration on your computer:
For Linux, this can be done using the following command:
cmu --set-proxy <ip> --port <port>
Note
If the computer is in other location or is a customer’s computer, you need to contact the IT responsible for that place to get the information.