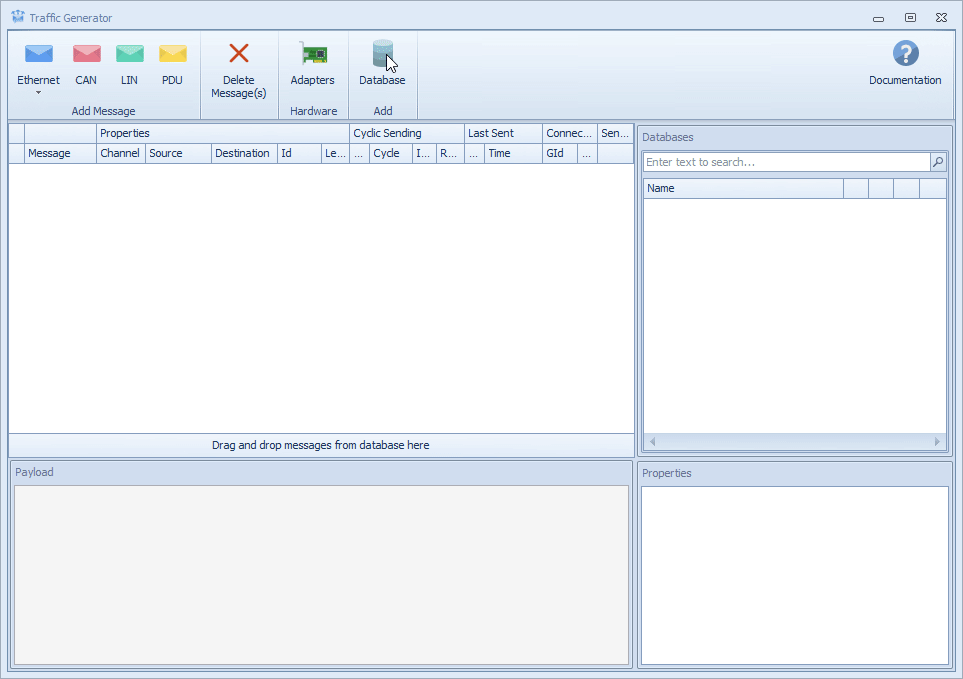
Traffic Generator
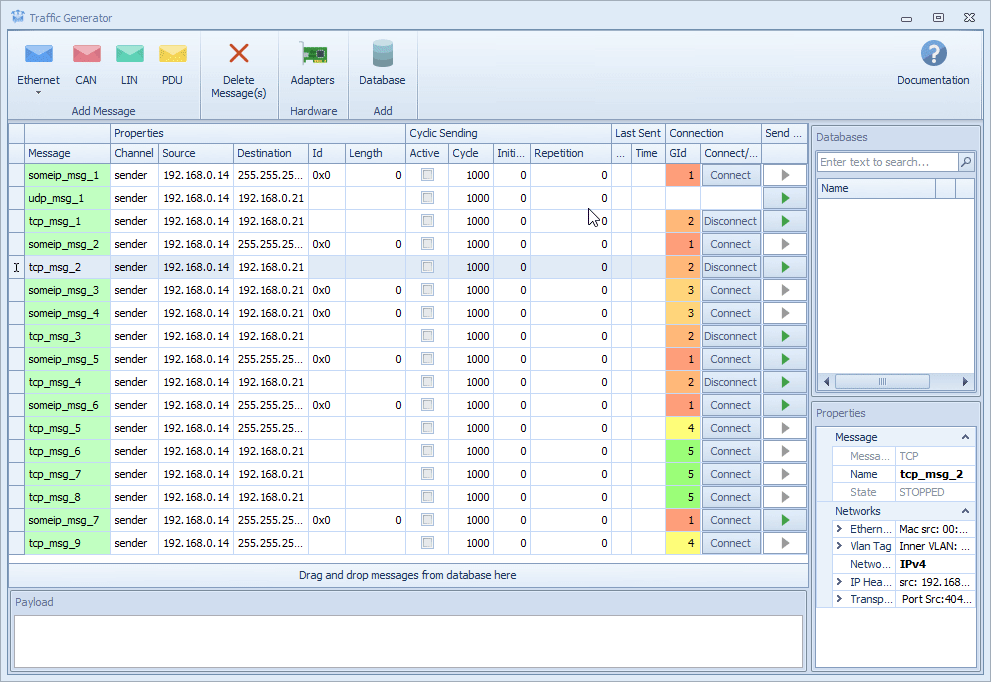
A configured message could be transmitted according to various trigger conditions. The message properties, its payload and the sending configuration could be provided manually. As follows, a detailed description for the Traffic Generator tool.
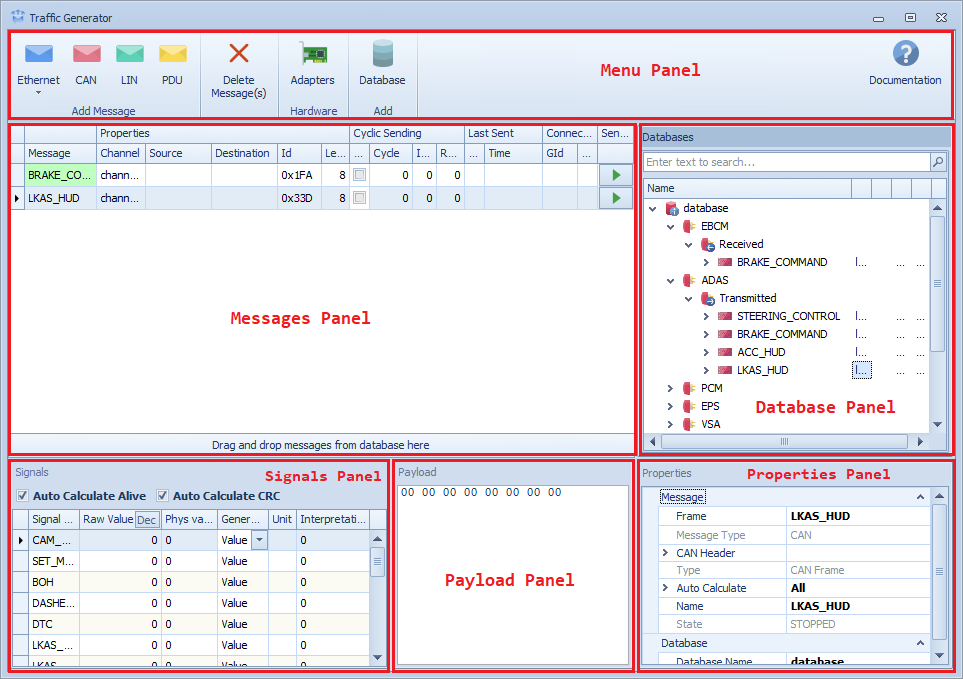
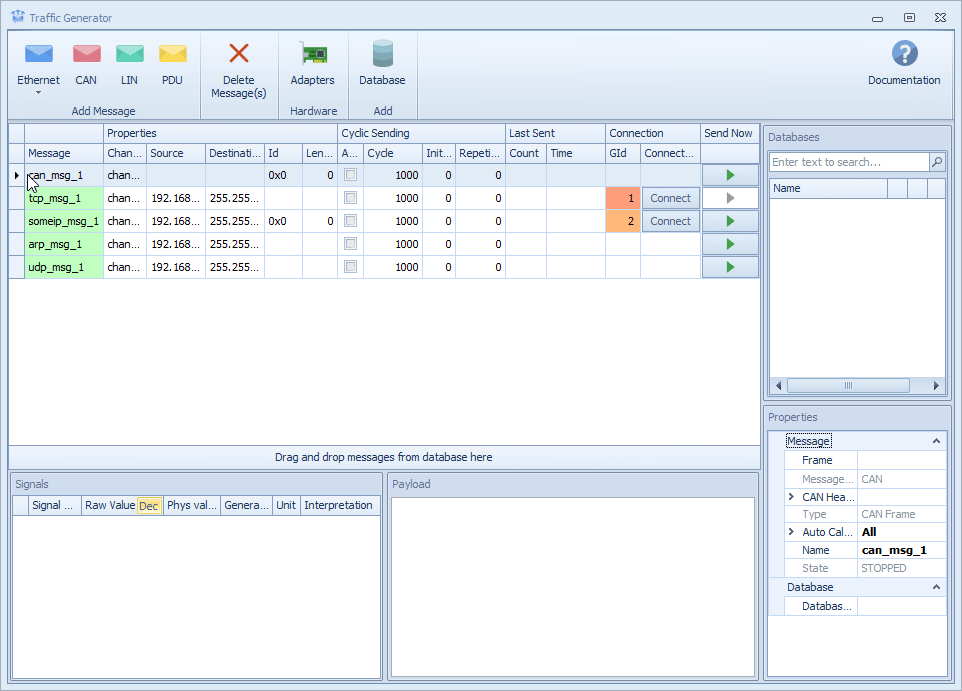
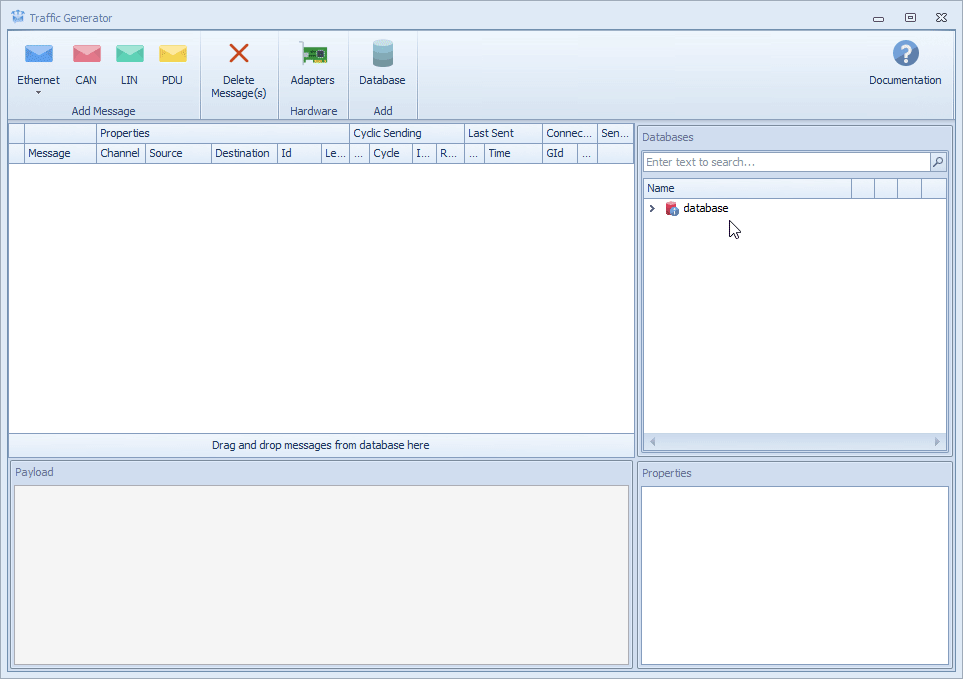
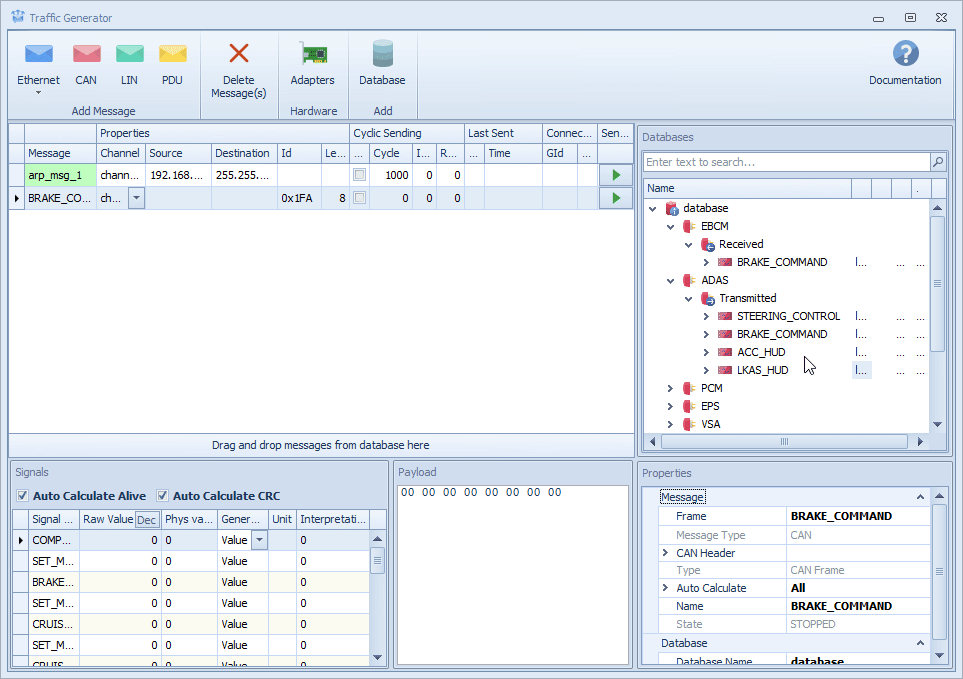
Messages in a database can be dragged from the Database Panel and dropped into the Messsages Panel.
Database Panel Shows the content of each loaded database in a tree view. Normally they are organized hierarchically, e.g. the Ethernet Fibex databases, where there are several ECUs, contain the provided and consumed services, such as fields, events... etc. From this tree, it’s only possible to drag and drop a message into Messages Panel.
The message could be edited in the Properties Panel.
Properties Panel The properties of every selected message in the Messages Panel are displayed via the properties panel. While some properties of this panel can be edited by the user, some others are fixed.
The raw payload of the message that would be sent could be specified in the Payload Panel.
Payload Panel Displays the data of the current message selected in the Messages Panel in a hex dump style.
The raw and physical signals values could be specified in the Signals Panel.
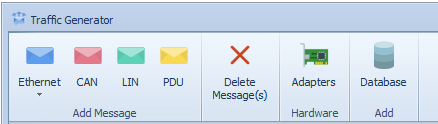
Toolbar
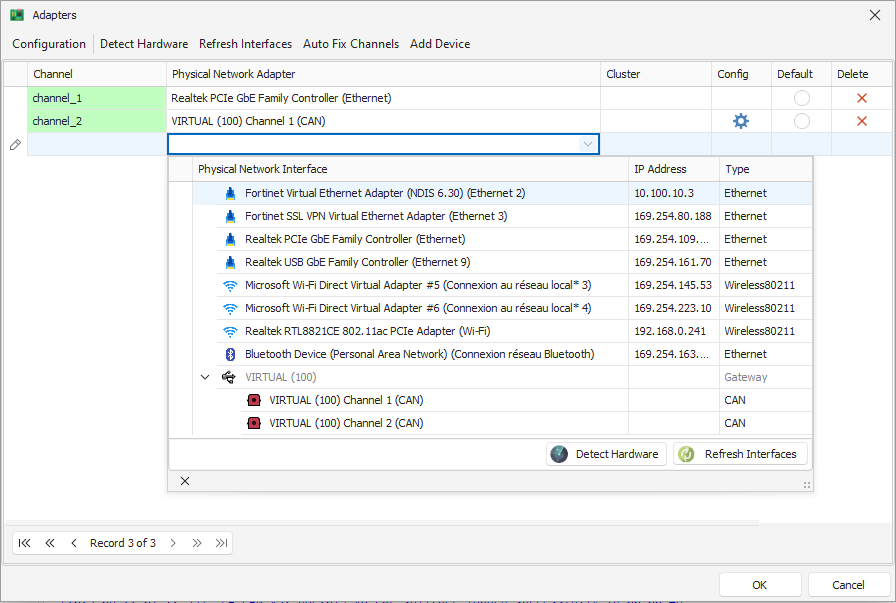
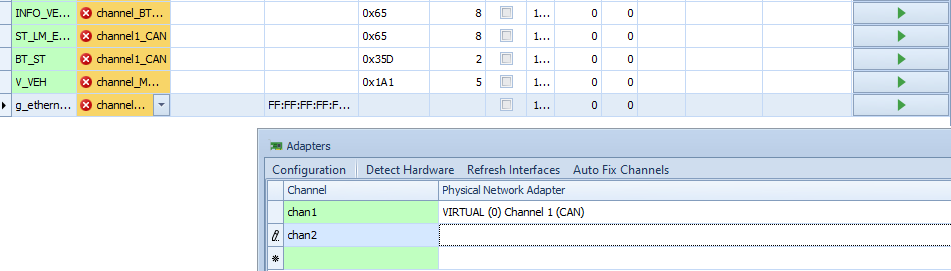
Adapters It is possible to use different network devices, such as Ethernet Network device, Vector hardware and Technica hardware like MediaGateway.
It is necessary to map the physical network devices to channels because Traffic Generator uses them to send and receive messages. This mapping of channels to adapters can be done in the Adapter section, which allows:
Saving or loading a required configuration in a Network config file *.ccf extension using
Configurationbutton.Adding a new channel by editing the empty row in the bottom of the grid.
Deleting channel using the button
Deleteof the grid.Refreshing the list of interfaces using
Refresh Interfaces.Detecting if there are new adapters using
Detect Hardware.Setting the ChannelAdapters defined in the atp file to physical network adapters as defined in tmp/<project>.config , using
Auto Fix Channels. It starts with checking the adapters names, if not successful, it tries the IP(s) to make them compatible. This makes it fast to run a project from a repository through a CI system on multiple worker nodes/test benches.
Message Configuration
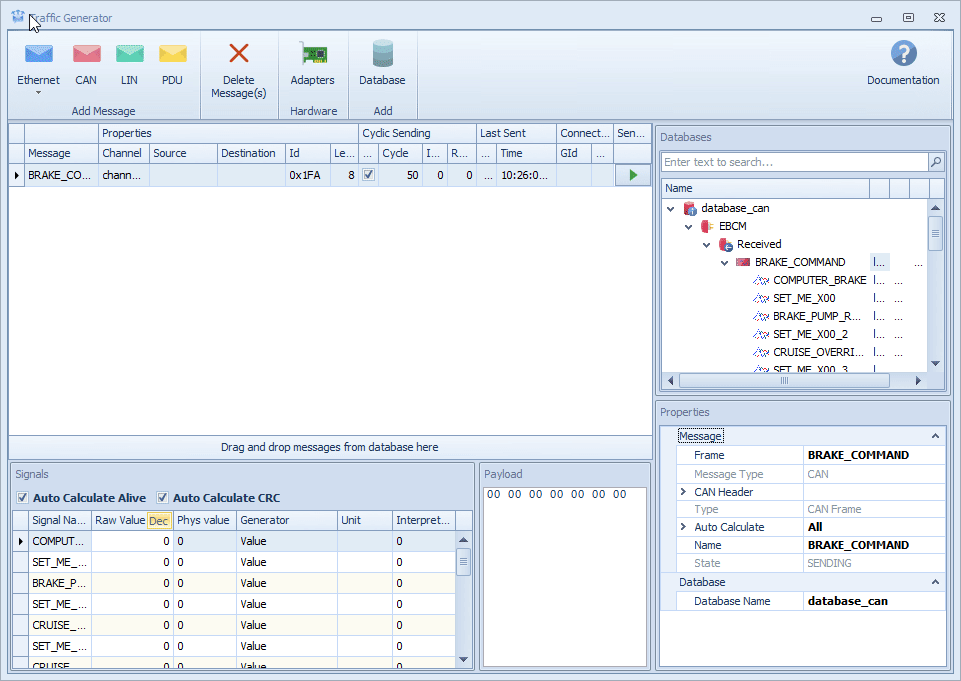
Channel The channel is affected automatically according to the support of the message physical network adapter.
A drop-down list contains the supported adapters:

If the channel name is not compatible with the configured channels in Adapter Configuration, the channel will be marked in yellow color and an error icon will be set.
Source Source address of the message (MAC or IP).
If the source IP is not got from database or it is not compatible with adapter IP source (after the configuration), the source IP will be marked in yellow color.
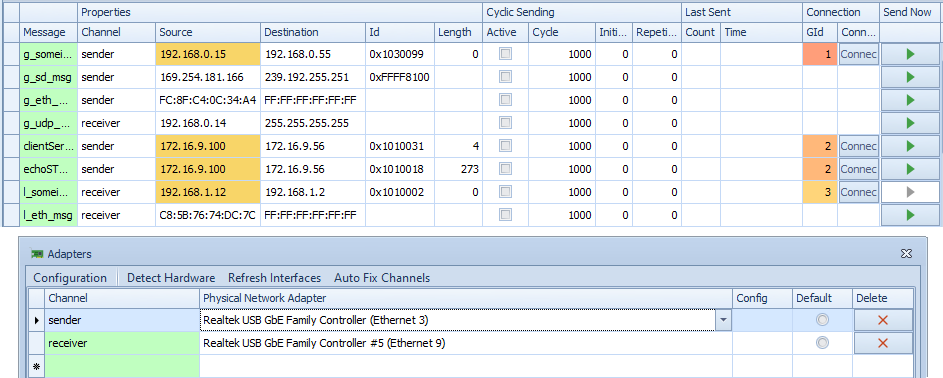
Destination Destination address of the message (MAC or IP).
Id The user has to fill the box with the message Id.
Length Size of the payload.
Cyclic Sending
Active Turn On/Off cyclic sending.
Cycle Used to fix the cycle time of the generated message.
Initial Delay The user has the possibility to choose the initial delay to start sending.
Repetition The user has the possibility to choose either to send the generated message infinitely or with a defined number of repetition.
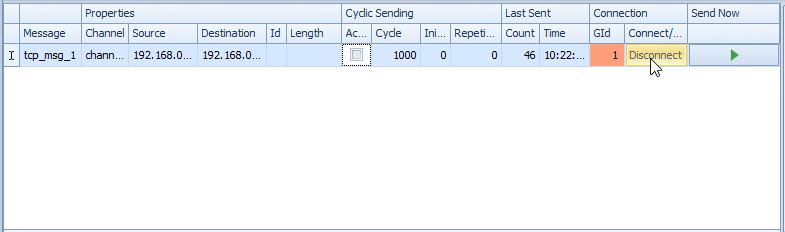
Last Sent
Count Shows the number of messages sent.
Time The time of last message sent.
Create messages with drag/drop from database
Load a database.
drag/drop it from Database Panel.
You can drag a message from a database and drop it into another message. This will erase the old message and replace it with the new one.
Note
This option is available only for CAN and LIN messages.
Customize the message signals and payload
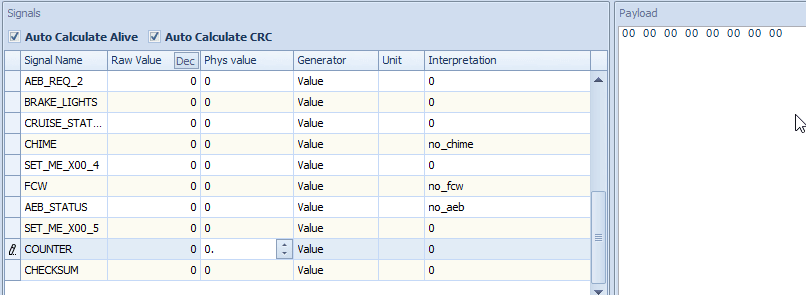
In the Signals Panel, the signals of the selected message are shown. These signals are customizable. Changing any value will affect the payload
Generator
The generator is used to customize the physical value of a signal. The signal will follow, through time, a predefined or a customizable function. The impact of changing the generator column is seen using the Signal Graphics tool.
Generator Column
The generator column could be set to one of the following options:
Value When this option is selected, the generator will have no effect on the physical value of the signal. This option is selected by default.
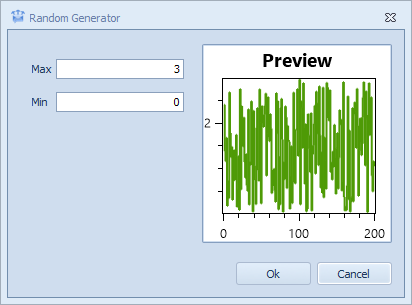
Random When this option is selected, a pop-up window would be displayed asking for Min and Max values. Once set, the generator would then change the physical value of the selected signal randomly while respecting the minimum and maximum values entered previously. The preview in the pop-up window would give an approximate estimation of what the signal's output might look like in the Signal Graphics tool.
Sinusoidal Wave Choosing this option and filling the Min, Max, Phase, and Frequency fields make the generator force the physical value signal to follow a sinusoidal wave function. A preview of a cycle of that function would be displayed.

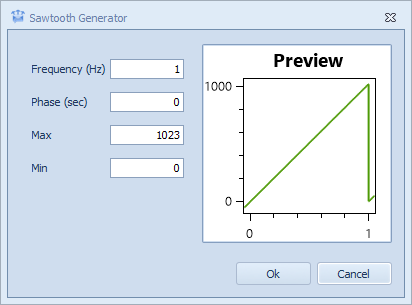
Sawtooth This option makes the physical value signal follow a sawtooth wave. In order for it to function properly, the Min, Max, Phase, and Frequency fields must be filled. The preview illustrated in the pop-up shows an approximation of what the generator will make the physical value signal look like.
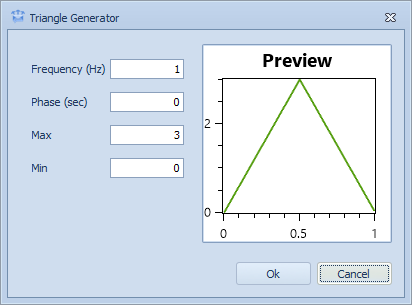
Triangle To make the signal output of the physical value follow a triangle function, this option should be selected. A preview of the one cycle of the function is displayed with the default values of the function's parameters (Min, Max, Phase, and Frequency). The preview will change once the default values are changed to the desired ones.
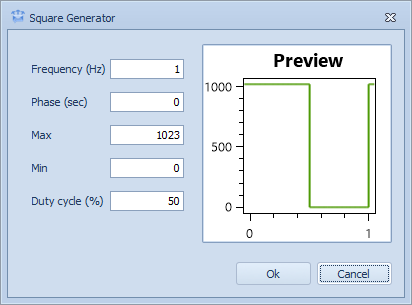
Square Selecting this option means making the signal output of the physical value follows a square wave shape. A preview containing the shape of a single cycle will be displayed once the Duty cycle, Min, Max, Phase, and Frequency values are configured. Otherwise, it will display a default shape according to the default values.
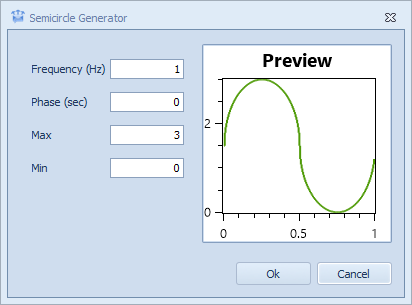
Semicircle The semicircle function option makes the signal output, if configured, follow a semicircle periodic wave. One cycle of the wave is displayed automatically with the default values. To configure it properly, Min, Max, Phase, and Frequency fields should be adapted as desired.
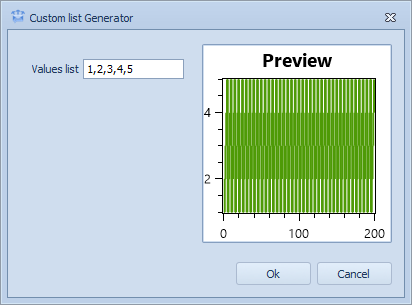
Custom List This option requires the use of a list of values. The values entered should be separated by a comma "," in order for the list to be recognized. The physical signal output will iterate on the values list one by one, while respecting the order they were introduced in. An illustration of some cycles that the function would follow would be presented in the pop-up window.
Equation In order to customize the physical value of a specific signal according to a specific function, this option should be chosen. It would require entering the lowest and highest values of the desired function (Min, Max) and the equation that the physical value should follow. The preview in the pop-up window will provide an approximate estimate of the output of the signal in the system.
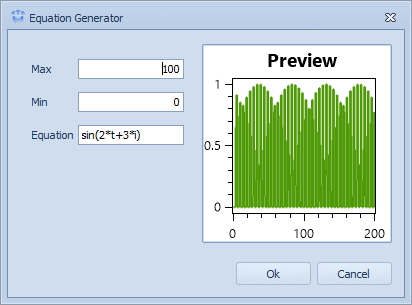
To customize the equation, a specific syntax should be respected. The equation should define a function depending on, at most, two variables "t" and "i" where "t" represents time and "i" represents the index of the message. The following table contains possible operators and functions that could be used in the definition of the equation:
Keywords |
Description |
Example |
|---|---|---|
+ |
Addition |
a+b |
- |
Subtraction |
a-b |
* |
Multiplication |
a*b |
/ |
Division |
a/b |
^ |
Exponentiation |
a^b |
# |
Modulo Function |
a#b |
sin |
Sine Function |
sin(t) |
cos |
Cosine Function |
cos(t) |
tan |
Tangent Function |
tan(t) |
abs |
Absolute Function |
abs(t) |
sqrt |
Square Root Function |
sqrt(t) |
sec |
Secant Function |
sec(t) |
Tcp Connection
GID Connection Group Id.
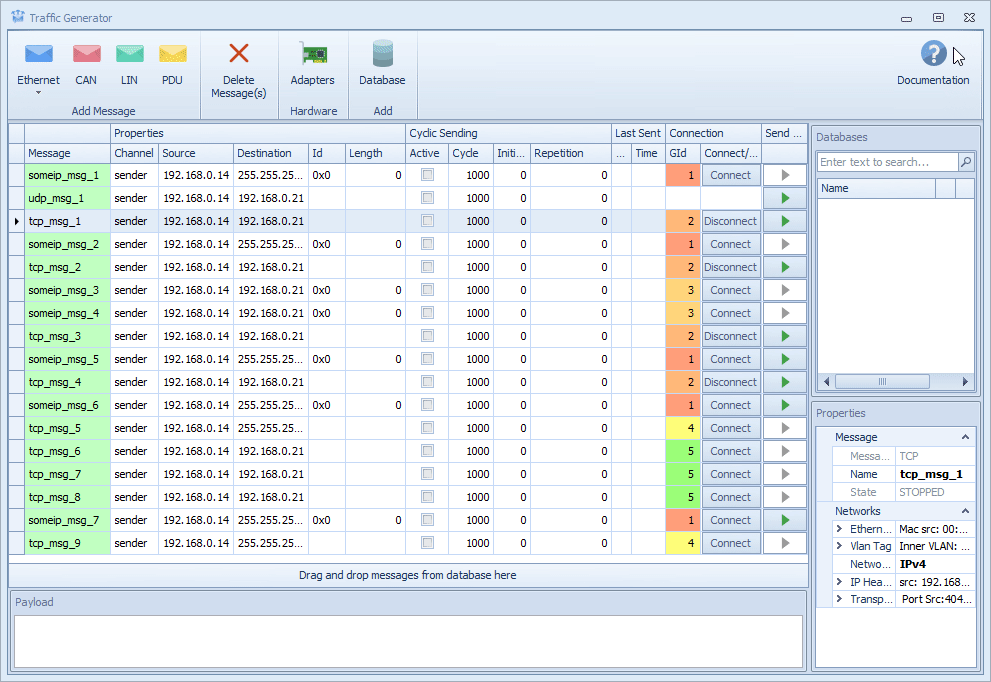
Connect/Disconnect establishes/ends the established TCP connection.
Messages over TCP
To establish a TCP connection, click on the button automatically added in the grid with the label Connect.

If the connection is established, the button's label switches to Disconnect.
Group Connection
Messages belonging to the same group connection share the same:
src ip and port
dst ip and port
channel
vlan and qinq vlan
Once one message gets connected to a server, all the other messages of the group connection connect automatically.
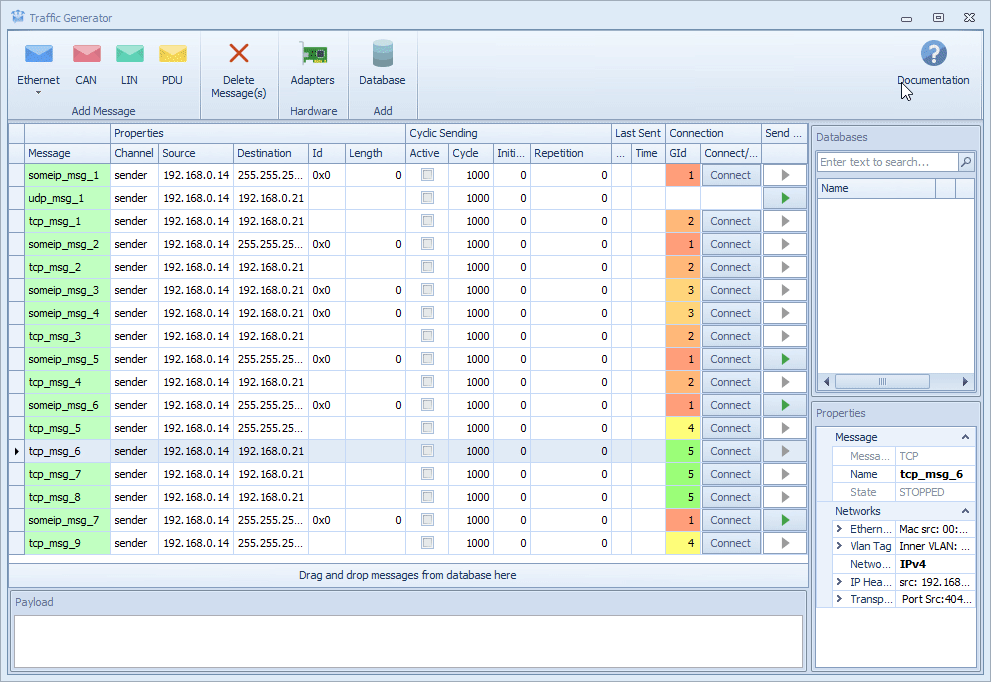
Messages of the same group connection have the cell of the Group Id column colored with the same color and labeled with the same connection number (example: 1, 5).

When we click on a message's disconnect button, all the messages of the group disconnect
Once a message belonging to a group is connected, changing any value of the parameters defining the group will result in disconnecting that message and changing its group.
- Two ways are available to send the message:
one at a time by clicking on the button Send now.
cyclic sending by checking the checkbox Selected.
To stop the connection manually, click on the button label Disconnect.
Send Now
If the Send now button is disabled, the cyclic sending can't be triggered.
Reorder Messages
To organize and reorder the messages in the Messages Panel, select a message and drag and drop it to the desired position through the row indicator (the row indicator is the block left to the first column).